Personalize your own views
The system provides some default views with different columns and conditions preset. In case they may not meet your individual needs, you may want to customize yours. You may do this by saving your personal views after making changes of a view with “Edit Columns” and “Edit Filters” functions provided by the platform.
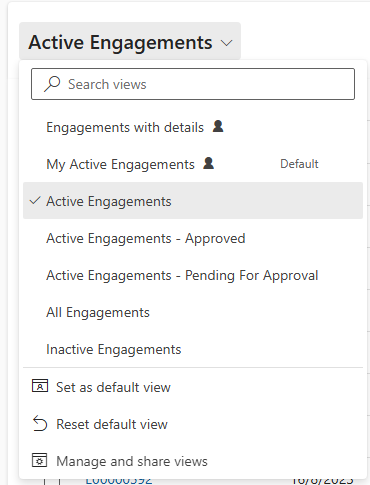
Step 1: Select the view which you may want to modify on top of it, say “Active Engagement” view. by using the view selector.

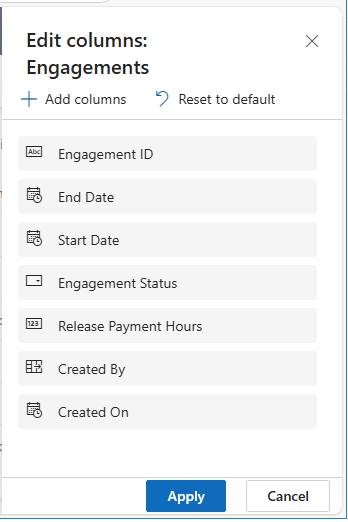
Step 2: Click “Edit Columns”


Step 3: Press "+ Add columns" to choose the fields desired from the list and then press “Close“ button at the bottom of the page after adding
Step 4: Sort the display order of columns by dragging field up or down in the column list or remove column with the "Remove" option in the "…" menu of individual field
Step 5: Press “Apply” button at the bottom of the page to apply the changes to the personalized view
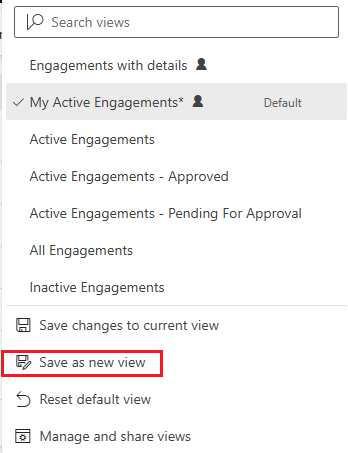
Step 6: Click the view select box and choose “Save as new view” to save the view modified with a new name, say My Active Engagements

Step 7: Click the view select box and choose “Set as default view” to set the new personalized view as default on your own preference

For more about "Edit Columns" and "Edit Filters", please visit Microsoft Power Apps document.